You go outside on a cold and windy day to find that your Columbia, MD heating oil tank is empty. But it’s only been a month since it was last filled! And then you see it: the patch of stained ground under the tank. How could that be? You haven’t noticed any dripping oil or cracks in the tank. And now you have to spend the money to have your tank replaced. If this scenario sounds familiar (or if you never want it to sound familiar), then you’ve come to the right place.
Oil heating offers cozy and efficient heating even during the harshest of winters in Columbia, Maryland. However, with all of oil heating’s many benefits come some drawbacks. Oil tanks are not invincible fuel storage containers, and without proper care and attention, that oil could leak out as quickly as the money from your wallet. By limiting the growth of corrosion and taking proper care of your oil tank, you can enjoy efficient and warm winters for years — even decades — to come.
Primary Cause of Oil Leaks
To understand how to forever avoid the abovementioned scenario, we first must address the cause of many of our oil tank troubles: microbial influenced corrosion (or MIC). This type of corrosion is caused by the bacteria that thrives in water. This bacteria creates an acidic environment in the oil tank that accelerates the corrosion process as well as the formation of sludge.
Water can collect in the oil tank for a variety of reasons. Quick changes in temperature, for example, can cause condensation to form along the inside of the tank. That condensation then rolls down to the bottom of the tank and collects there. Water may also collect in the tank because of the tank filler or vent pipes being exposed to rain, or poor oil deliveries that somehow allow water to enter. In addition to giving a homeland to the bacteria, water in the tank will also reduce the efficiency of your heating.
Leaks can also be caused by a variety of other issues. An unprotected tank or fuel line can be damaged and leak oil. An insufficient connection where the piping connects to the tank could be another source of leakage. And of course, a prolonged lack of preventive maintenance also increases the chance of a leak.
If you’re not paying close enough attention, it really is possible for a tank to be empty within a month. More often than not, oil doesn’t escape through a gaping crack that’s easy to see, but it more often starts with pinhole-sized leaks. When the tank is empty, you can also look for a dark line of corrosion along the interior of the bottom of the tank.
Once your tank has begun to leak, get professional help immediately. Not only does an oil leak cost more money on your part, but oil fumes are combustible and will reduce indoor air quality in your home.
How to Avoid Oil Leaks
It may be difficult to catch a leak once it has begun, but there are plenty of ways to prevent leaks from sneaking up on you.
- Some old tanks may just need to be replaced. If a steel tank is 10 years or older, it may be past its prime and in need of replacement. Call a professional to come evaluate the state of your tank before you invest in a replacement.
- If you have a steel tank, it may be worth your while to look into other materials. Some modern tanks are made of polyethylene or fiberglass, both of which are far more resistant to corrosion than steel. If you don’t want to part with your steel tank, you can have it fitted with a polyethylene lining that will separate the tank shell from the corrosive bacteria inside the water.
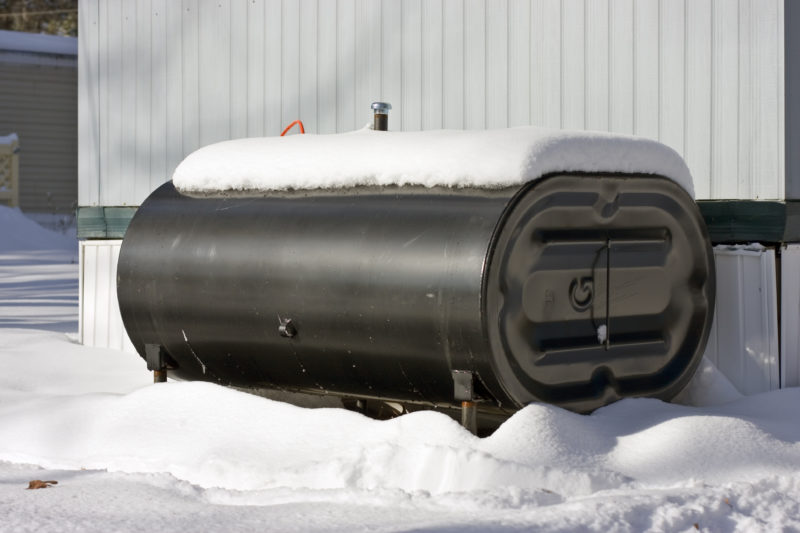
- Leave space around outdoor tanks. This usually involves removing plants and keeping snow away. If your tank is near a door, window, or somewhere else where it can be easily damaged, consider having it moved by a professional. To truly prevent any damage, create some kind of barrier around the tank as well as a roof with snow guards above it. Falling ice can damage the tank and make it more likely for leaks to form.
- Consider bringing your fuel tank inside. After all, if the fuel is warmer, it will actually burn more efficiently. Plus, a tank that is kept inside is protected from snow, rain, and other elements, which means it is less likely to experience that pesky corrosion. Keep the tank in the lowest level of the building with a drip pan underneath just in case a leak forms. If you decide to bring your tank inside, you’ll need to check it regularly for leakage, oil stains, and odors. Don’t get lax and allow those vapors to fill the rest of the building. If you can’t smell anything, but you or others in the building are experiencing an increase in headaches, nausea, dizziness, or dehydration, have a professional come and inspect your tank.
- Protect the fuel lines. Keep them as short as possible to prevent possible damage. Continually check where fuel lines connect to the tank to make sure they are as tight as possible. If the connection is dirty or dark, it’s very likely that oil is slowly seeping through. If your tank is outside, protect the fuel lines from snow in addition to the rest of the tank. Allowing the snow to collect around the pipes can damage them and hide leaks.
- Change oil filters yearly.
- Configure the area around your oil tank in a way that water can easily drain. Accumulated water and snow will freeze, then later thaw, causing the pad to move and potentially damage piping or even topple the entire tank. Sloping the tank at a quarter of an inch toward the outlet will make it easier for water to drain from the bottom of the tank, preventing corrosion.
- Keep the tank full. The less surface area that water has to condense, the better. But don’t fill it so much that there isn’t enough expansion room for the oil (in warmer temperatures, the oil expands slightly). If there isn’t enough room for expansion, oil can back up through the fill pipe and spill.
- Before temperatures drop and after the spring thaw, have excess water removed by a professional. If not, all of that water will fall to the bottom of your tank and become a bacteria breeding ground.
- Book an annual inspection conducted by a licensed professional. But don’t let that keep you from conducting your own inspections. Regularly check the interior and exterior for rust, dents, bent and/or pinched lines, cracked seams, and loose connections. During inspection, be careful when touching dents or spots with corrosion. In those places, the integrity of the tank may be weaker than it seems.
TankSure: Columbia, MD Heating Oil Solutions for You!
We understand that you may be unsure of your own leak-checking skills, so we are pleased to offer the TankSure program.
All of the previous methods will help you avoid leaks, but the TankSure program provides a surefire way to prevent leaks as well as assistance when the leaks occur. For home and business owners with TankSure, we conduct a test using safe ultrasound technology. This test detects internal corrosion and potential leaks. During these tests, in addition to searching for leaks, we evaluate the safety and integrity of your tank and inform you if you need to replace your tank before it’s too late. And it gets better. If your tank qualifies, you can receive up to $2,500 toward the replacement of your old tank.
You have plenty of other things in your busy life to worry about than whether or not your oil tank is leaking. Taking the previously mentioned steps to prevent such a leak can save you valuable money and time, as well as ensure cozy comfort in your home during cold winters. And don’t forget, the TankSure program is always available to those who want the professional assurance that their tank is sound and efficient. If you have more questions about oil heating or the TankSure program, call Griffith Energy Services at 888-474-3391.
Image provided by Shutterstock